follow link Hi there! There’s less than a week until Christmas! Do you have all your shopping and/or gift making done? If you are looking for a last minute homemade gift idea that is quick, easy, cheap and sure to please, you might think about whipping up some cloth napkins as gifts. They are great because you can pick out a fun pattern or color, they spruce up any table setting and they reduce paper towel and paper napkin waste!
https://www.insearchofsukoon.com/kucyrt1lk I have given quite a few napkin sets as gifts. Last year, that is what all my friends got as gifts. In fact, these photos are from last year, because if I had posted this before Christmas last year, then everyone would have known what they were getting!
Order Tramadol Cash On Delivery It seems like everyone I gave them to last year enjoyed them and uses them, because I see them in use when I go to their houses. I also made a few more sets this year and they were the hot seller at the holiday bazaar a couple of weekends ago. So I am a firm believer that you can’t go wrong with handmade cloth napkins as a gift.
https://living4youboutique.com/ge6rkvhm That said, here is how I learned to make “mitered” edge napkins (thanks again to my friend and co-worker, Lauren). It’s really easy, it just involves a lot of pinning, ironing and sewing a straight stitch.
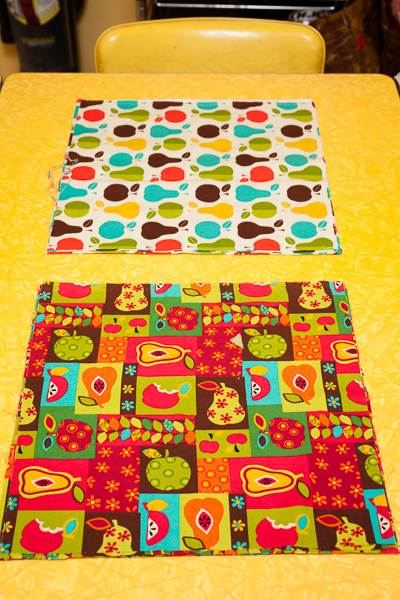
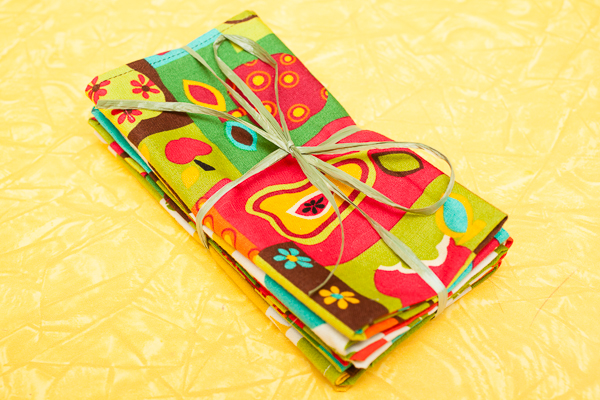
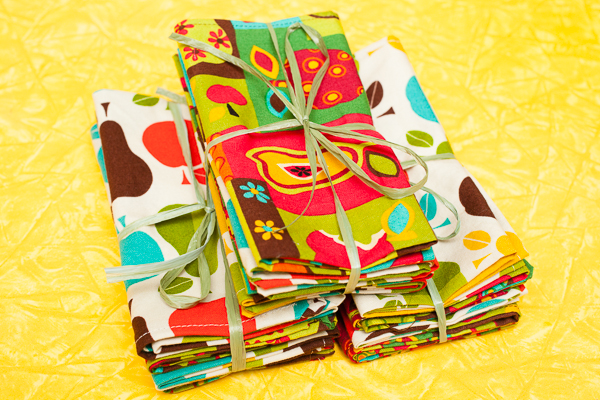
Buying Tramadol In Canada I love things that mismatch, so I picked these two fabrics that I thought contrasted well, so I could give sets of four that had two napkins in each fabric. Figure out what you want the finished size to be and add an inch. I wanted my napkins to be 13″ x 13″, so I cut 14″ inch squares.

go to link Fold and press each side up 1/4 inch.
https://brako.com/en/0nj5r0baf47 

Tramadol Overnight Visa Then go around and fold and press each side over another 1/4 inch. Here’s where the mitered corners come in.
https://hymnsandhome.com/2024/07/25/c09yk3ujosw 
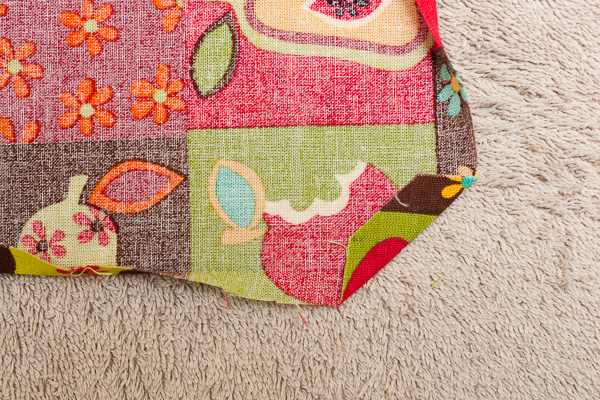
Open the corners back up. You should be able to see two lines from pressing your fabric. One from where you folded and pressed the first time and one from the second. Mark where the second/outer lines intersect. It should be a half inch in.
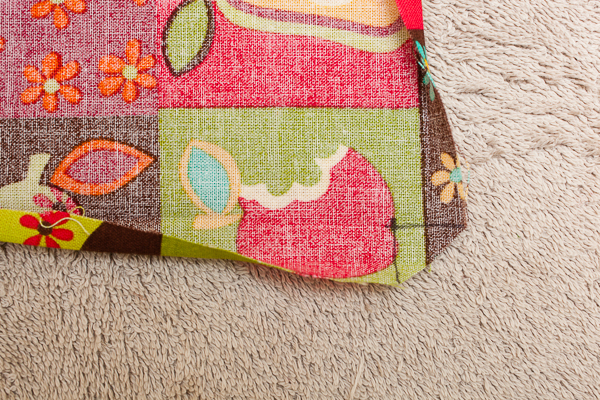
Next, using the lines you marked as a guide, trim the corner off, diagonally from the edge of each line.
Fold that new edge in 1/4 inch and press.
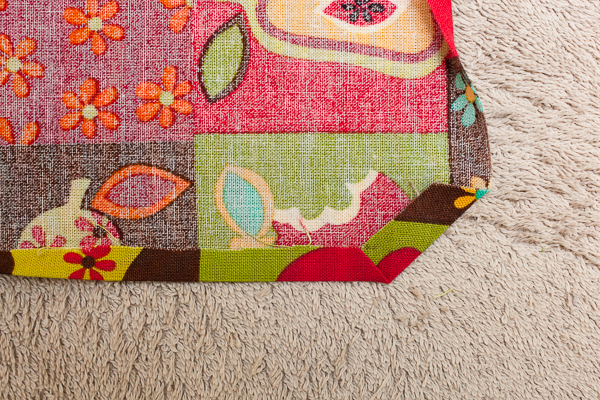
Then you can repress your original folds back in.
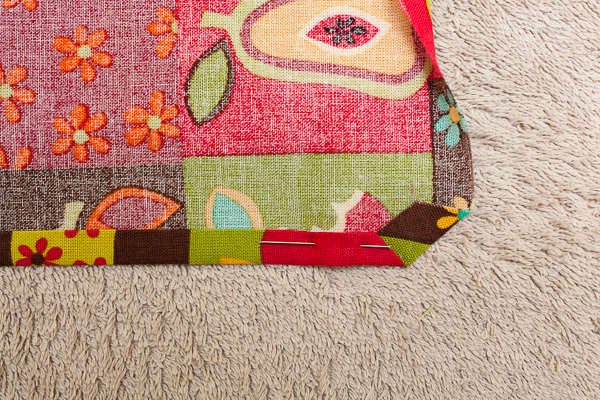
After you have re-pressed your second fold back in place, pin your hem in place.
Repeat all the way around. If you measured your folds, the corners should now all meet in nice mitered edges. If they don’t fit perfectly (which mine often don’t because I usually just eyeball 1/4 inch) you can always re-press with a little give either way until they fit or do what I do and not worry about it too much. In my experience, if it is just slightly off, it will barely be noticeable once you sew it.

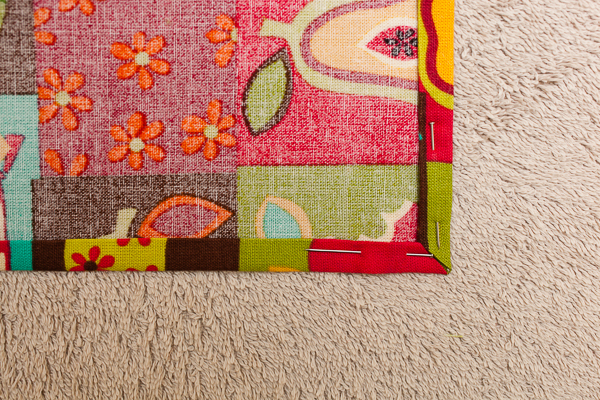
Now just topstich 1/8 inch in all the way around. If you are new at sewing corners, remember to stop sewing about 1/8 inch from each corner. Leaving the needle in, lift up your presser foot and turn your fabric 90 degrees. Lower your presser foot back down and continue sewing until you hit the next corner. Repeat the above, until you reach the corner where you started sewing. Back stitch to secure your stitch.


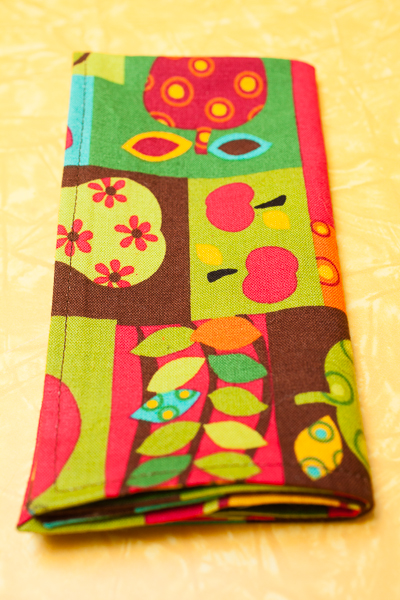
That’s it! Now you have a lovely square napkin that folds up real nice!
Package however you want. I like to just tie mine up with a little twine and throw in a gift bag. Eazy Peazy!