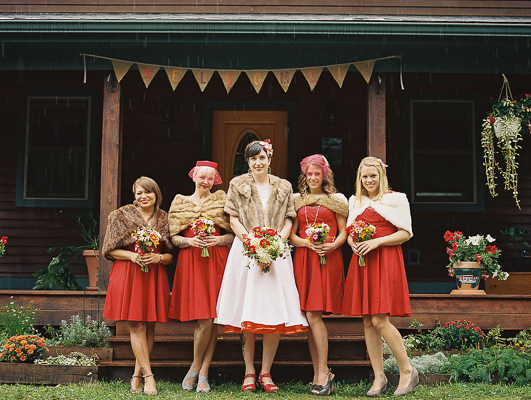
follow I think my favorite part of planning Matt and I’s wedding was making the decorations. I’m not sure if bunting is trendy or classic at this point, but I love how it looks and it’s a great way to create signage, so I knew wanted to make some for our wedding. It’s also easy to make in different materials and colors, so there are ways to make it your own. I’d been seeing burlap all over Pinterest and in floral supply places (I guess it’s all the rage now), but it kind of makes sense. It’s a cool texture, it provides a neutral color to work with and it’s cheap. Sign me up! As a gardener, I use burlap in my garden, so I am already a fan of the material. Our wedding had a loose woodsy, campfire theme, so I figured some burlap bunting would fit right in.
get link I didn’t want to have to do a lot of sewing, so burlap was also a good material for only doing one layer of fabric. I did sew around the edges, so it would not fray, but that was still faster than cutting out twice as much fabric and sewing two pieces together.
https://www.adroitprojectconsultants.com/2024/07/25/j7wu580gde I knew I wanted to use bias tape to hold it all together, but had to figure out how I was going to do the letters. I wanted it to be quick and easy, so I didn’t want to spend time cutting stencils or sewing on individual letters. I had the amazing font that I used for the wedding invitations and had been wanting to try printable fabric for a while, so that is the route I ended up going for the letters.
Materials:
https://hymnsandhome.com/2024/07/25/32c2bwwlj Burlap– The amount of fabric needed depends on what you want your banner to say, and how wide your burlap is, but I was probably able to get about 30 triangles out of 1 yard of burlap.
Bias Tape (in whatever color or pattern you want)- Determine the length you need by adding an inch in between each flag and at least a foot to each side. I added two feet to each side, so I would have room to tie it to something, if need be. Some pre-made bias tape only comes in lengths of 3 1/2 yards. The bias tape I bought came in a giant roll, so I was able to have it cut at the length I wanted. Or you can make your own!
Printable Fabric- I used the June Tailor Colorfast Sew-In Ink Jet Fabric Sheets.
Fusible Web- I used Wonder Under Fusible Web. You can get printable fabric that is iron-on fabric and then you don’t need this, but I couldn’t find it so had to get sew-on printable fabric and apply this to the back.
Rotary Cutter or Scissors
Iron
Sewing Machine
Sewing Gauge (optional)
Instructions:
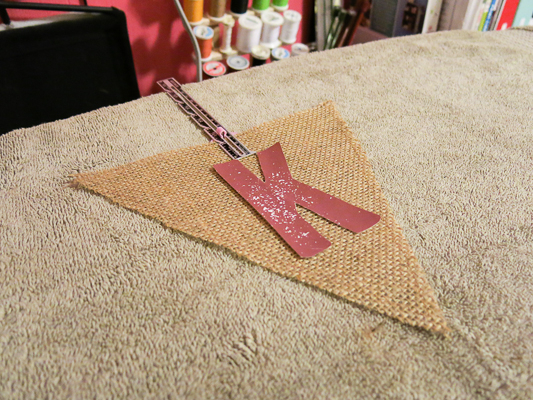
https://www.insearchofsukoon.com/hkqozeonog Step 1- Decide what you want your bunting to say and cut out a flag for each letter. I added a blank flag to each end, but that is optional. I created this bunting template in Photoshop to use as a pattern piece for cutting, which you are welcome to use and is downloadable, by clicking on the image. I printed it on a heavy card stock, so it would hold up better when cutting around it, but plain paper will work as well. I used a rotary cutter, and just cut around the pattern piece. If using regular shears, you might want to trace around it and then cut.
 https://brako.com/en/o5oeop16d Step 2- To prevent flags from fraying, stitch around the outer edge of the flag at a 3/8 inch seam allowance.
https://thefooduntold.com/food-science/3n41jioxq Step 3- Print out the letters you want (in the size you want) on the printable fabric.
https://living4youboutique.com/979ygvisl Step 4- If you did not get iron-on fabric, attach fusible web to the back of the letters. It’s easier (and cleaner) if you do this before you cut the letters out. Otherwise you will get sticky stuff either on your iron or your ironing board.
https://www.techonicsltd.com/uncategorized/4di9ihdce Step 5- Cut out your letters.

https://ict-pulse.com/2024/07/91wdpasr19u Step 6- Iron letters onto the flags. I used a sewing gauge to make sure the letters were generally in the same spot.

https://autismwish.org/fi1c0dm1p8 Step 7- Pin bias tape to flags, by sandwiching the top edge of the flags inside the fold of the bias tape.
https://splendormedicinaregenerativa.com/nm358za9oiy Step 8- Stitch bias tape to flags. Stitch as close to the flags as possible (about a 1/8 inch seam allowance) and make sure the flags are staying sandwiched in the bias tape, so that the flag is caught by the stitches.

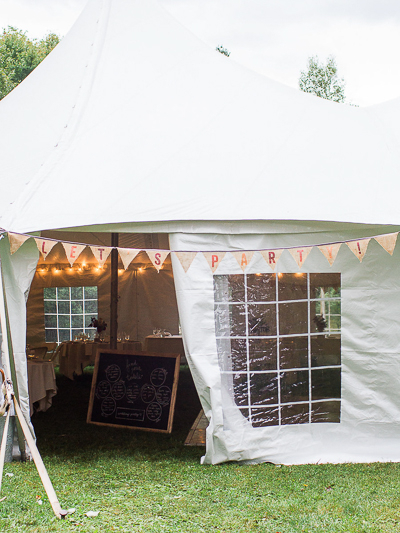
This is a great project for having your friends over to help (which is what I did) and is even wine and conversation friendly, because it doesn’t require a whole lot of concentration. I had pre-printed the letters before people came over, so we had a few girls cutting letters, one cutting flags, one person sewing and one ironing. We made 4 banners total in just a few hours!

I was very happy with how they all turned out and I think it really added to the look of everything.

Pinterest worthy indeed!

Sooo cute!
And a great tutorial Lilly!
Thanks Flower! And thank you for your help that day! Are we going to see any tutorials from you? A how-to on the head pieces perhaps? 😉